
Wednesday, November 5, 2008
Final UT3 Environment

The Gameplay Demo File
The Expertise in Action Demo File
Draft UT3 Environment
The Real Time Image Captures
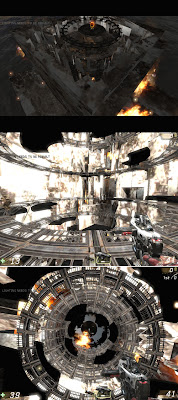 KISMET
02 – This image shows another view of lighting effect inside the building.
03 – Lighting with trigger – When player touches on the trigger located at the ground level of the building, the light will turn on every one second per each floor. This effect will help players to evacuate from the fired building.
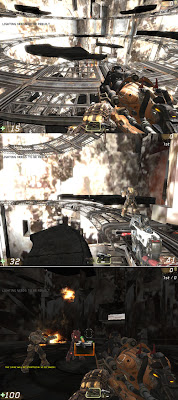 MATINEE
05 – This image shows the narrow pathways on each level. The slabs are located along the pathways. Players have to carefully jump to the slabs otherwise they will fall to the bottom and need to start the game again.
06 – After the game trailer, players will start on the ground level of the building. Players need to combat each others to be the first person who reaches the top.
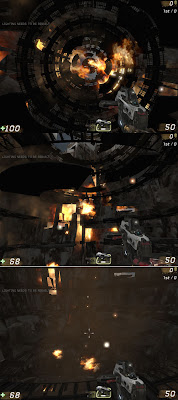 PARTICLES
08 - To enhance the game environment, the fire effect was created. Players are not only careful with the dangerous narrow pathways and moving slabs, but they also need to evade the fire.
09 – Smoke and sparks is also created in this environment. The overall building is covered by smoke. This makes even more difficult to players as they cannot clearly see the way out.
Snakes abd Ladders in UT3
To create a game inspired by Snakes and Ladders game in UT3 environment. The game should involve activities and rules in which players have to make some decisions and take a risk in order to achieve a certain goal.
The distinctive elements between the original and our UT3 Snakes and Ladders game:
Multiplayer
Original Game - Snakes and Ladders can be played by a number of players, more than two on a playing board with numbered grid squares.
UT3 Game – Our game also provides for multiplayer. It is constructed in a 3 dimensions gaming space rather than the original grid paper.
One starting point and one ending goal
Original Game - Each player starts with a token in the starting square and takes turn to roll a single die to move to the goal.
UT3 Game – After the game trailer, players will start on the ground level of the building. At that place, there are only four slabs waiting for transferring players to the upper levels. Players need to combat each others to be the first person who reaches the top.
Up-Down
Original Game - If they land on the bottom of ladders, then they can move the token up. On the other hand, if they land on the higher-numbered square of a pair with a snake, they must move down.
UT3 Game – In stead of snakes or ladders, moving slabs are used in this UT3 environment. The slabs will be moving either up or down. Thus, the players have to a make decision and take luck in this game.
Responsibilities of our team members
- Moving slabs (with sound effect)
- Camera setting for trailer at the beginning of game start
- Interior
Kismet - Rebecca
- Lighting with trigger (the light on each floor will turn on every 1 seconds)
- Lighting with sound effect
- Teleportation
- Set the activation time of trailer
Particles – I (Wirada)
- Focus on fire effect (and related fire burn sound effect)
- Flame
- Smoke
- Sparks
PARTICLES - Experimentation within Unreal Ed
 Fire will be mainly used in our final environment. So, here is my first experimentation showing frame, smoke, and sparks effects in the chosen model. The small image shows the first attempt. However, the result was not quite impressive because the fire looks spongy. To solve this problem, I reduced the spawn rate and area of particles in the Cascade Editor. The fire now becomes more realistic.
 I experimented with the movement of light and shadow affected from the fire. Matinee (movement) and Kismet (sequence) techniques were also used here.
 The image above shows a simple spark effect. This effect involved a number of properties including as follows:
- Initial size – The size of sparks – oval shape
- Acceleration (gravity) – In this experiment, sparks travel to the ground and up to the ceiling.
- Initial colour – Red & White
- Collision – hit floor and bounce.
Group Members
Team Members & Specialisation:
Teresa Ng [http://benv2423teresang.blogspot.com/] - Matinee
Pui Pui Yeung [http://3155738pyeung.blogspot.com/] - Kismet
and I, Wirada Deerajviset - Particles
As the previous experiment 1 and 2, I explored the effects of explosion in different environment (water, air, and ground). Thus, I volunteer to do PARTICLE which is related to creating effects such as rain, fire, smoke, and snow.
Precedent Game: Snakes and Ladders
Model: Pui Pui Yeung’s X model – The concept of “exploder placing in container”

Tuesday, November 4, 2008
IMPORTING INTO UT3
“ASE Importer Error: Did you forget to include geometry AND materials in the export? Faces: 121251, Texture Cooridates (Channel 0) 0”
Before I seek help, I had applied material to the model in 3dsMax again and tried to export it to UT3 many times. I still could not work it out so I decided to ask help from Russell and Graham. The problem is quite normal. It is not the problem with texture or material but what I need to do is only ‘using these settings’ before exporting. After I found the solution, it became very easy, no matter many models I have to transfer. The images below show my X, Y, and void models from the previous experiment.
Thank you to Russell and Graham.


Wednesday, October 8, 2008
UT3 EDITOR - MY TWO ROOMS
UT3 EDITOR - BASIC LEVEL PART 03
UT3 EDITOR - BASIC LEVEL PART 02
UT3 EDITOR - BASIC LEVEL PART 01
GAME DEFINITION
Monday, September 22, 2008
The Volumetric Effect of an Explosion on Porosity
According to the thesis on porosity of Richard Goodwin (2007), the term “porosity” refers to the notion of the permeable edge that exists between public and private space and the scale of the city.
My X and Y cactus models (The Rotate and The Zoom) are based on Richard Goodwin’s idea of porosity. The two models present the effects of explosions in a
Pores can be referred as minute openings in a surface through which fluids may pass.
The Rotate
The Zoom
The Pan
Sunday, September 21, 2008
Saturday, September 13, 2008
Mass Properties - VOLUME

The total volume of my model is 100993.85 cubic meters.
X% - 58
Y% - 33
100 993.85 x 58 %
= 58 576.433 cubic meters (the increased space)
100 993.85 – 33 327.9705
= 42 417.417 cubic meters (the finished volume)
100 993.85 x 33%
= 33 327.9705 cubic meters (the increased space)
100 993.85 – 33327.9705
= 67 665.8795 cubic meters (the finished volume)
The Cactus Model as a series of voids


The Approach to the Cactus Model
SketchUp
1. Create section planes.
- For the “Cactus Model” in SketchUp, the distance between each plane that I will use is 2.4 meters. The reason is that the height of every element is greater than 2.4 meters, so they will appear on section planes. It should have approximately 33 section planes.
2. Observe each section plane from the top to bottom of the building and find the similarities and differences.
- If it has the same plane with other section planes, highlight the first and last noticing section planes. Therefore, it is not necessary to find dimensions on all 33 section planes.
3. Find dimensions.
4. Print out all necessary planes with the dimensions.
5. Find the height of each element.
- With each plane, observe the height of each element. In case there is the same height, connect those elements together. After that, write down the height above and below the plane.
SolidWorks
1. Set up planes.
2. Sketch the profile according to the dimensions gathered from SktechUp
3. Use ‘Extruded Cut’ to make a void.
- Put the height in both direction 1 (the height above the plane and) and direction 2 (the height below the plane).
4. Continue to work on each plane.


363 George Street - The Envelope Solid Part


Once I understood how the SolidWorks works, creating the envelope of
1. Sketch the profile of each part from the top view.
2. Use ‘extrude’ feature to make the height of the building.
3. Repeat the 1&2 Steps for other two parts.
Solidworks Tutorials
PARTS
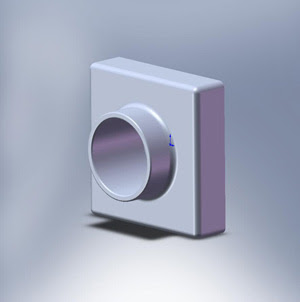
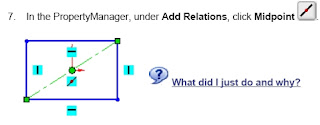
It was quite difficult at first since I was not familiar with the interface. However, each step provides a quick way of finding the tools by simply clicking on the tool. It will automatically guide us where that tool is. I found that constraining the base is quite interesting feature in 3ds max. It adds relation between elements and the origin.
LOFTS
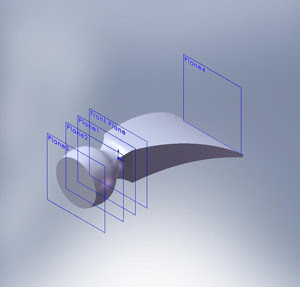
It is quite amazing on how the object becomes very realistic by just creating planes, sketching, and connecting the profiles. Unlike other softwares, 3ds max can deform the model into most flexible form. I found that this loft tutorial is not too difficult as it looks like.
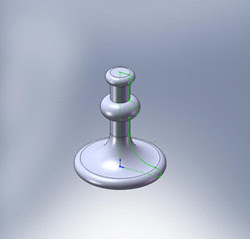
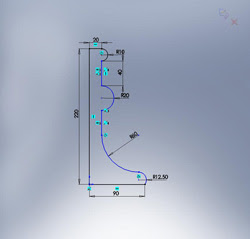
The ‘revolve and sweep’ feature is very similar to ‘follow me’ tool in SketchUp. It took me a bit of time to complete this tutorial. However, I started to be familiar with the interface because this tutorial involves many features. At this stage, I became fascinated with 3d max and would like to learn more about it.


